Access Your Dashboard
Log in to your Appz account and navigate to the dashboard. Select the form endpoint you wish to configure with a webhook.
Navigate to Automation Settings
Go to the Automation page and look for the “Send Webhook Request” action.
Configure the Webhook URL
Enter the URL of the webhook where you want the form submission data to be sent. This is the endpoint that will receive the JSON data from your form.
Click “Complete” to finalize the URL setup.
Test Your Webhook:
Once you have set up and saved your webhook, it’s ready to transmit data. Here’s what happens next:Submit a new entry through your form to test the webhook. The data should be posted automatically to the URL you specified, showing up in the format you have configured.Check the endpoint or the service you are using to capture the webhook data (such as webhook.site) to see the incoming submissions in real time.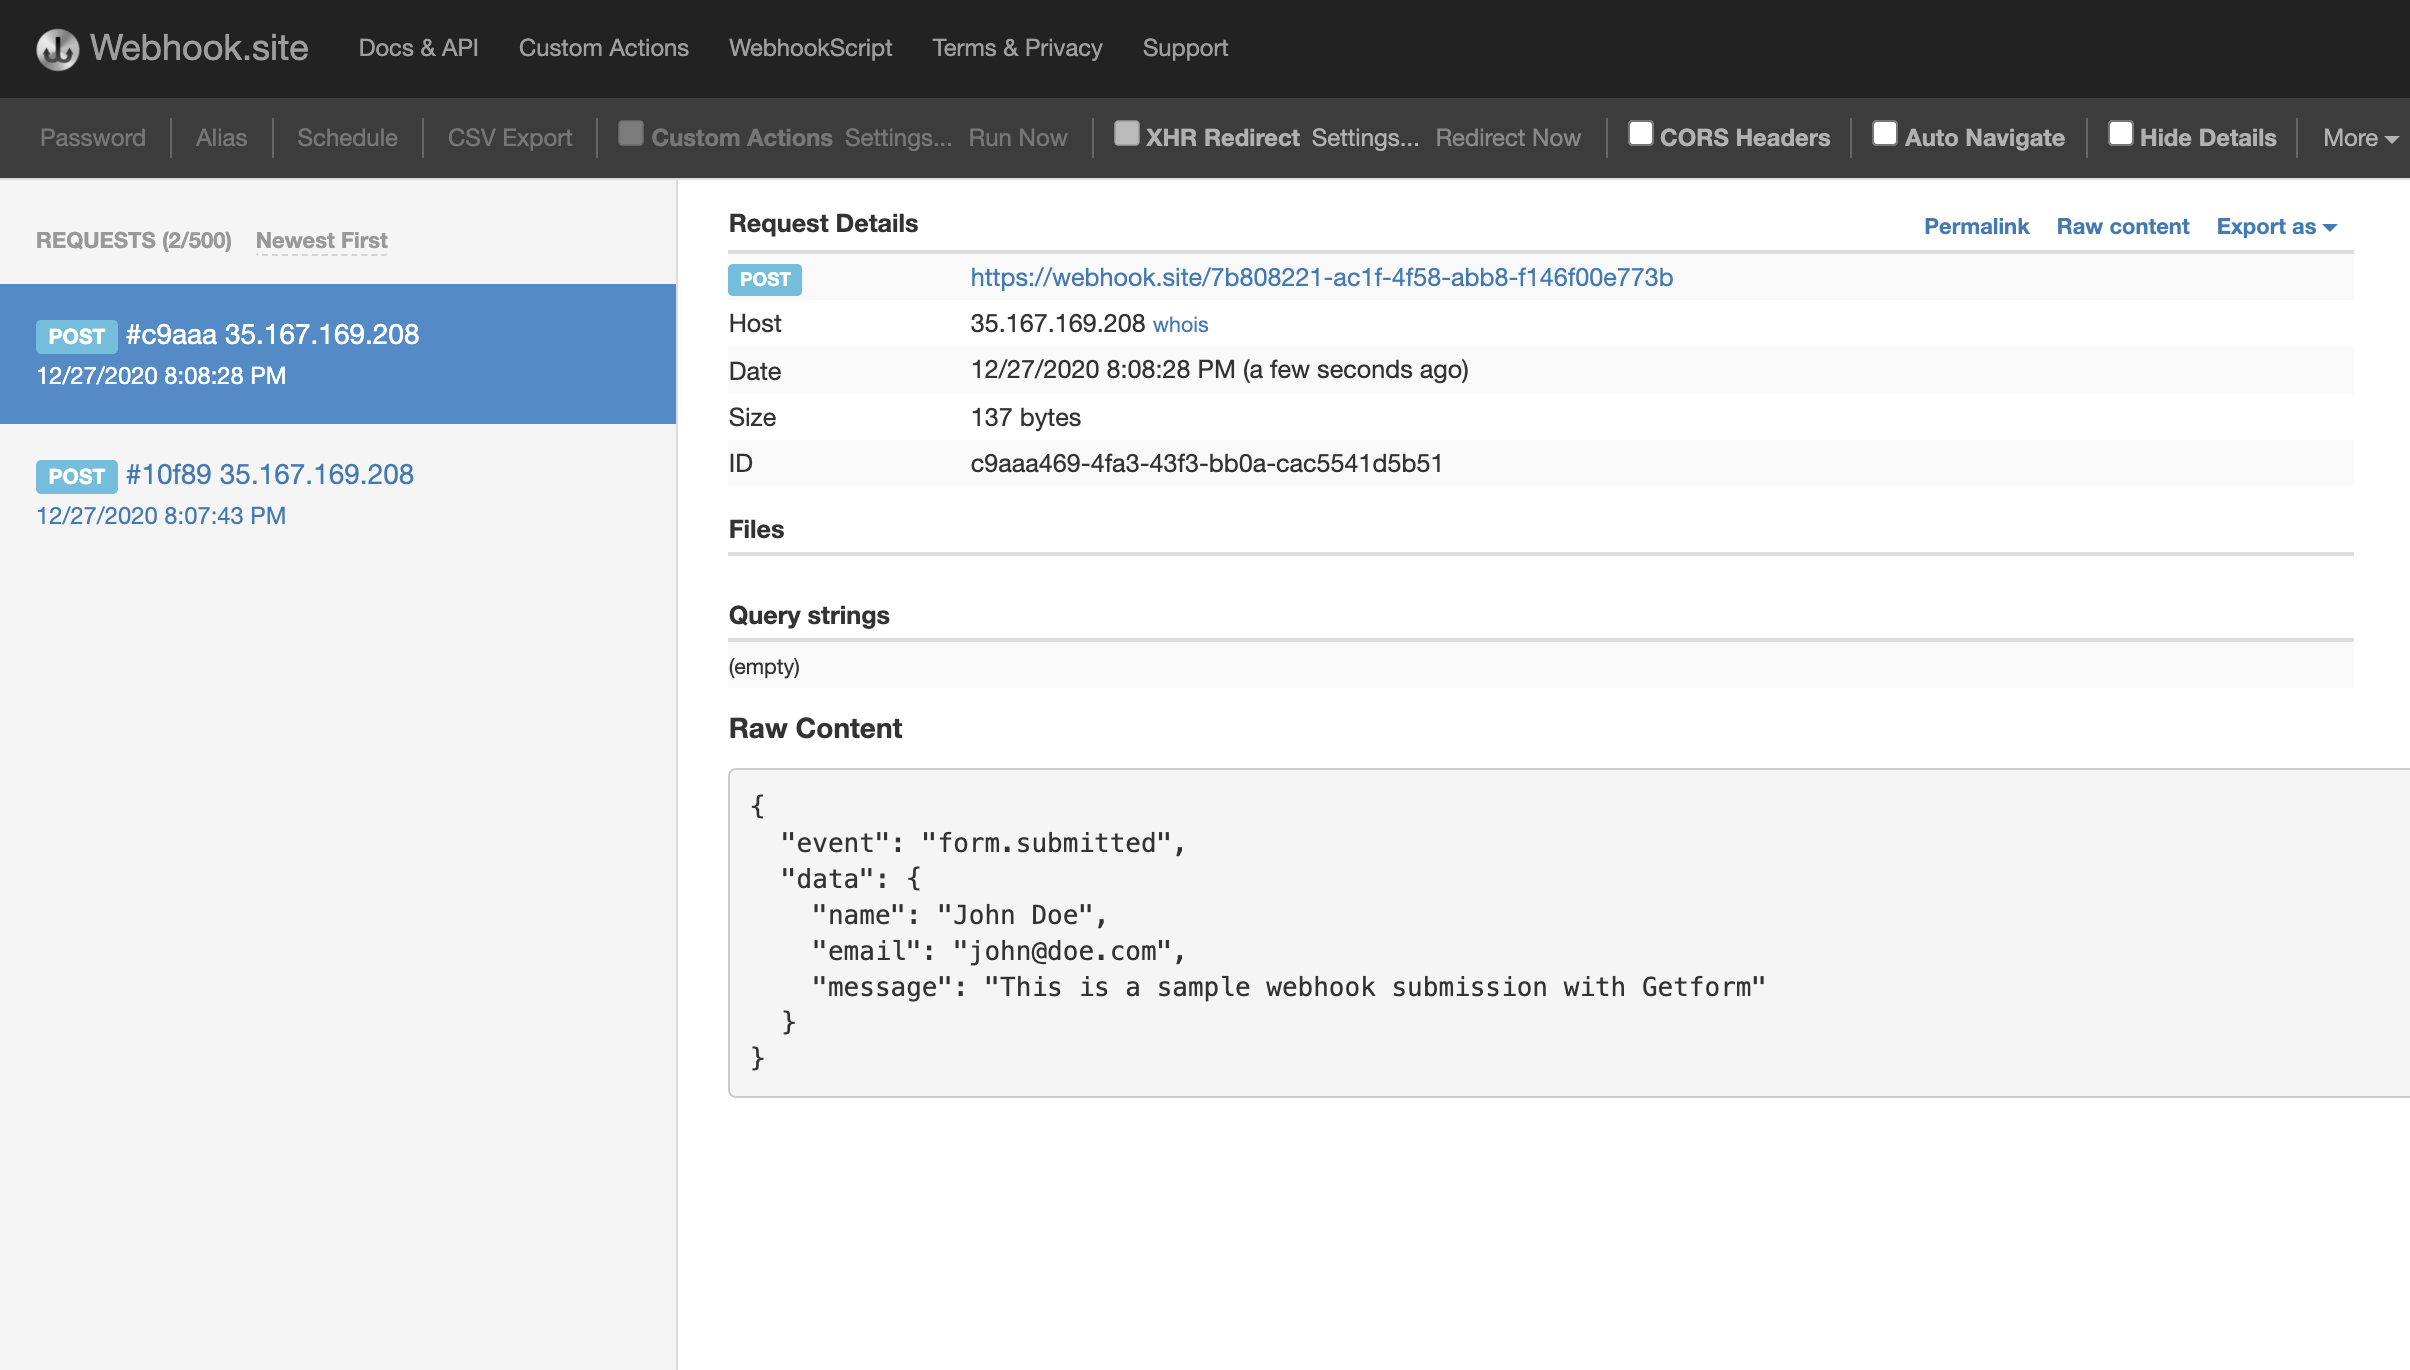
The Webhook plugin is available on All plans.